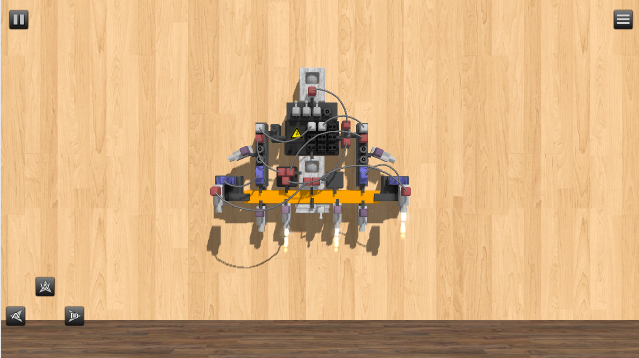
In this tutorial you will learn how to build a basic hovercraft. For a finished example level of the hovercraft, see the bottom of this page.
First, create a new custom level.
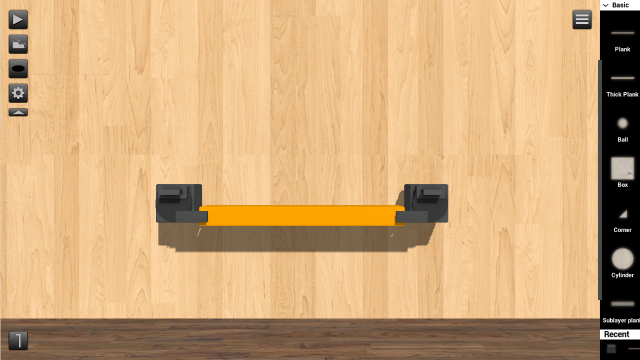
Add a Plastic Beam, click the configuration button to choose whatever color you like. Then attach two Servo Motors at both ends of the Plastic Beam.
Add a Thruster attached to each motor and a Tiltmeter in the middle of the Plastic Beam. The Tiltmeter outputs the angular displacement relative to its standing position. This will be used together with a gyroscope to prevent the hovercraft from falling over to the sides. Add a cable from OUT1 to the left Thruster and from OUT2 to the right one.
You can change to Orthographic Mode (under play button) to easier see where you place your objects.

When you click the motors its important that the purple line with a square is aligned together with the thrusters.
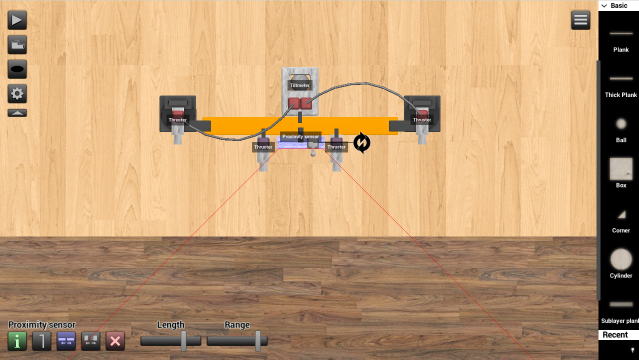
To keep the hovercraft above the ground we will add a Proximity sensor and two thrusters below the Plastic Beam. The Proximity Sensor measures the distance to the closest object and activates the thrusters when its near the ground. You can increase the length slider a bit to make it hover higher above the ground.
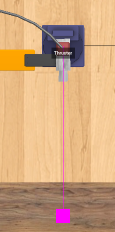
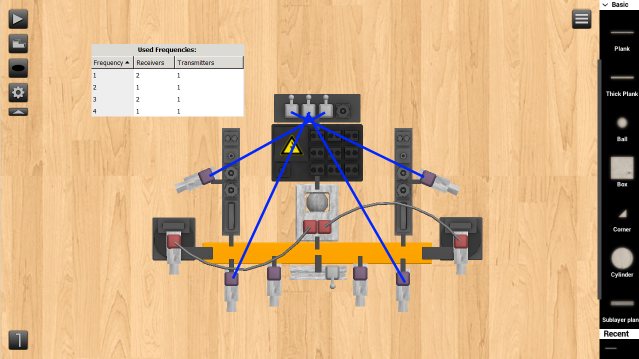
Instead of cables we will use a wireless connection by adding a Mini transmitter on the Proximity Sensor and two receivers, one on each thruster. You can leave the frequency as default.
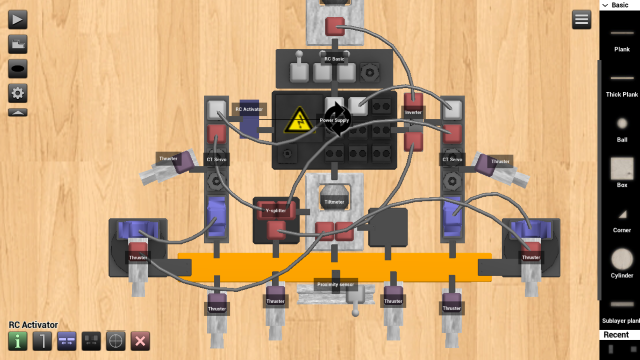
Add a Power Supply, two CT Servos for the motors and a RC Basic for buttons so we can control the hovercraft.

Click the configuration button for the RC Basic and drag out a button for left, right and up.
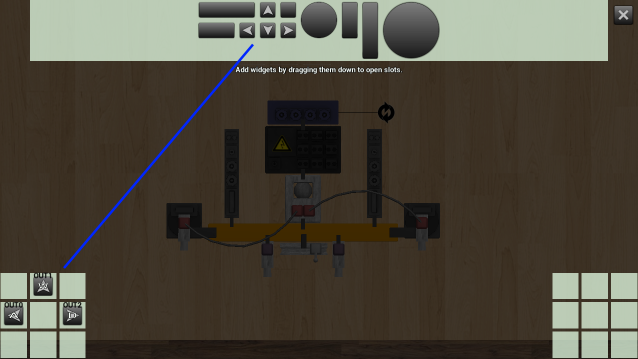
Add two thrusters for the up button, one for left and one for right. Then add a Mini transmitter with different frequency for each button on the RC Basic. Add a receiver with the same frequency as the Mini transmitter for that specific button and then attach them to the thrusters.
Now it's time to add the Gyroscope. This object continuously signals the absolute angle of the gyroscope a value from 0 to 1 where the output value is A/360 where A is the absolute angle in degrees. Together with an Inverter this will make the two thrusters on the motors always point down and keep the hovercraft balanced and stable.
Connect the Gyroscope to the Inverter and then use a Y-splitter object to connect the Inverter to both CT Servos. Then connect the Power Supply to both CT Servos, and finally connect the CT Servos to the Servo Motors.

To stop the hovercraft from wobbling we can use a Stabilizer object. This object is useful when you have a group of objects that need some sort of stabilization. You can adjust the sliders for how much stabilization is needed. No more than 0.05 should be needed for this hovercraft.
Add an RC Activator to the hovercraft so the RC is automatically activated at start. Click the RC Activator, then the target button and select the RC Basic.
Now the last thing we need to do is increase the thrust of all the thrusters. I use maximum for mine, see what works best for your hovercraft. It depends on the weight and size of the hovercraft. If needed you can add more thrusters or even replace some of them with Rockets which are much more powerful.
Congrats! You have now built a working hovercraft.