
In this tutorial you will learn how to create a bee smasher mini game! You will find the finished example level at the bottom of this page.
This mini game spawns yellow, blue and red bees that the player can smash by clicking on them. The yellow bees are the slowest and will give least score, the blue are a bit faster and gives more score and the red bees are fastest, spawns less but decreases the score when smashed and should be avoided.
Before we begin, let's look at an overview of the objects we will use in this tutorial:
First create a new custom level. Go to level properties, change the background to "Outdoor", and set gravity Y either to 0 or a bit below 0 to add some weight to the bees. For this tutorial we'll set it to -5 but you can fine tune these settings later. Go to the gameplay tab and check Display Score, Disable Zoom, Disable cam movement and Hide beam connections.
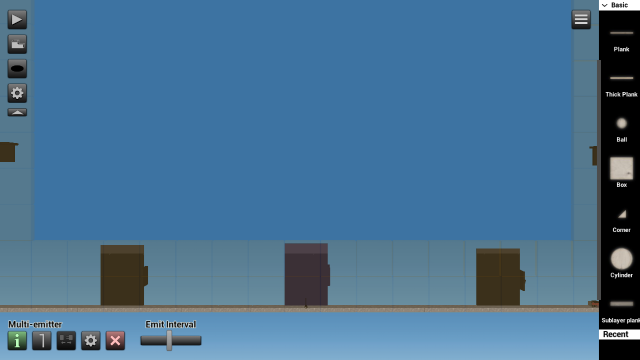
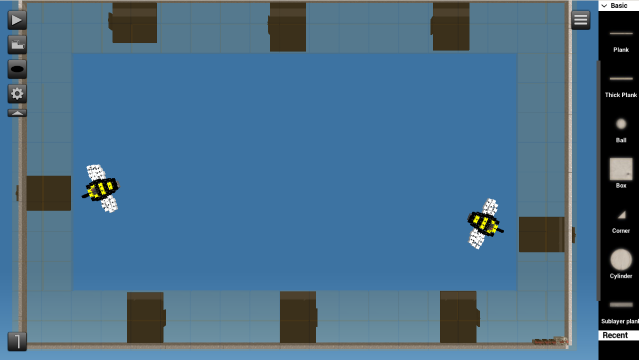
We will begin by designing the layout for the mini game. On layer 3, build a frame with maximum sized Pixels. Click the configuration button on the pixels to choose any color you like. The walls should be made of two large pixels so that the bees can spawn under them. The layout frame used in this tutorial has a size of 19x12 pixels.
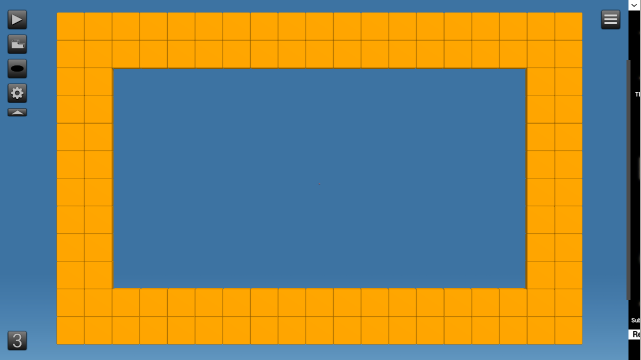
Click the Layer visibility button to see behind the pixels, then add Platforms lined together on layer 1 as a wall stopping the bees from flying away from the game area.

Add Multi-emitters. This object will emit copies of the bees. Add 3 on the bottom, 3 at the top and 1 on each side.

Now it's time to design the bees. We will use different colored bees for different scores. One yellow, one blue and one red. You can create something else instead of bees for your level, for example balloons or birds. Just make sure they are not too big to fit under the pixel walls.
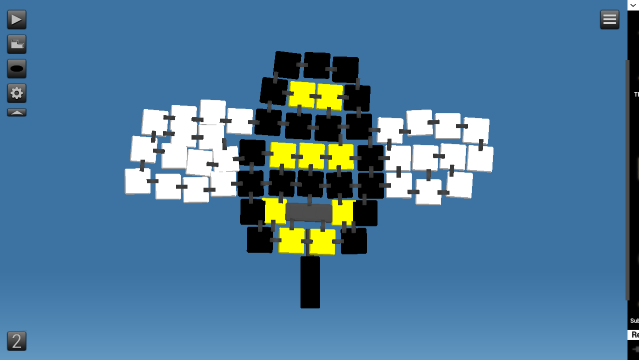
The bee will be made on layer 2 so that we can attach objects under it. To create the bee we will use Plastic Boxes with different colors. Adjust the size to smallest and begin "painting" your bee by attaching them to each other. Use Orthographic View (under play button) for grid snapping and better view.
Make sure to leave some space for a Cursor field object. This object will be used to detect when the player clicks on the bee.
Click the configuration button for the Cursor field and adjust the size of the field to cover the whole bee.
For maximum sized field, use these values:
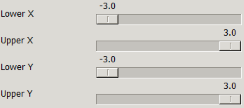
Click the Visibility Mode button so that we can attach the necessary objects under the bee.
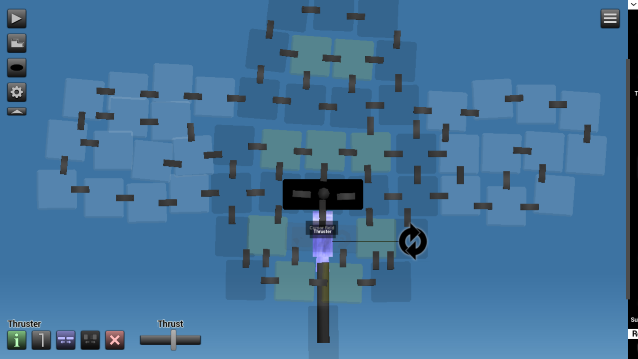
The first object we will add is a Thruster. This is a small rocket that will make the bee fly by itself. You can attach it to a small Plastic Beam and then attach the beam somewhere under the bee (change visibility again to attach). You might have to increase the Thrust slider a bit depending on the size and weight of your bee. Since this is a yellow bee it should not be set too high. You can fine tune the speed of all the bees later.
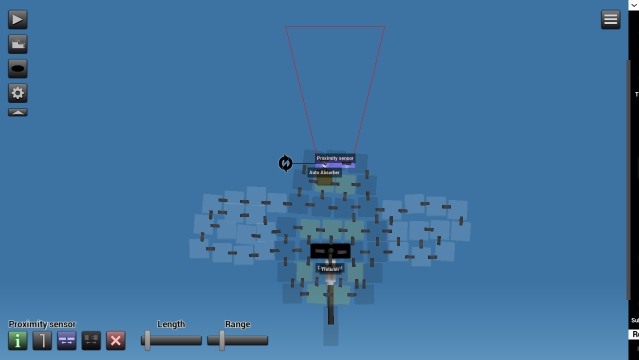
Add a Proximity sensor at the front of the bee. This object will sense when the bee is about to hit a wall or another bee, then a signal will be sent to an Auto Absorber which will remove the bee. This is to prevent having too many bees up on the screen at the same time. Add the Auto Absorber under the proximity sensor but don't connect them yet.
Adjust the Proximity sensor's length slider to about 3.00 and the range to 0.30
The Auto Absorber will also be used to remove the bee after being smashed (clicked on). To connect it to both the Cursor field and Proximity sensor we need to use an OR gate. We will also add an Y-splitter for an extra output socket which will be used for signaling a Game Manager to increase the score.
Connect OUT0 of the Cursor field (OUT0) to the Y-splitter, then connect the Y-splitter to one of the OR gate inputs, and connect the Proximity sensor to the other input of the OR gate. Then connect the OR gate to the Auto Absorber.
Finally add a Stabilizer to the bee to make it fly straight. Increase the Angular Damping just a bit, you can change it later when fine tuning the bees.

Now we will add a Mini transmitter to send a wireless signal to a Game Manager. You can leave the frequency as default (1) for the yellow bee. Attach the Mini transmitter to the empty Y-splitter output.
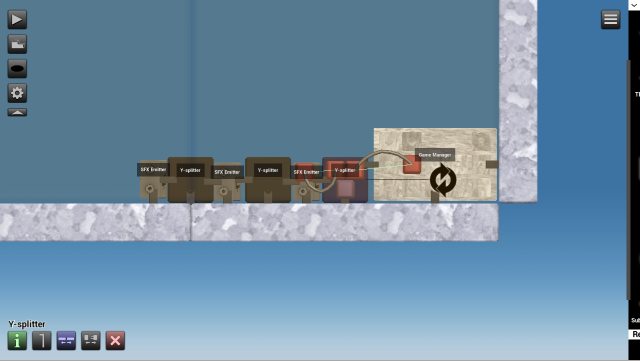
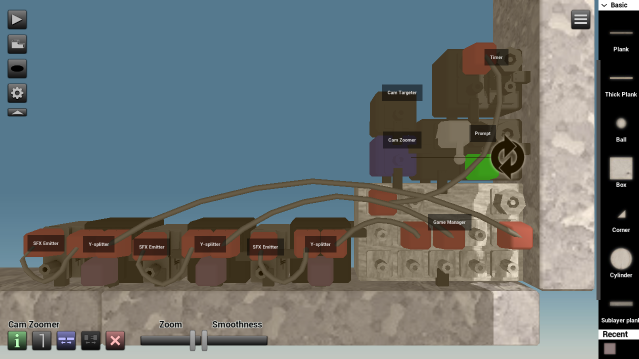
Put a Game Manager somewhere behind the pixel wall of the mini game layout. To play a sound when a bee is smashed, add a SFX Emitter and connect it to a Y-splitter.
Add a Receiver to receive the signal from the Mini transmitter and attach the receiver to the Y-splitter, then connect the Y-splitter to the correct input socket of the Game Manager (IN3 in this case). Click the info button to see what they do. IN3 gives +50 score.
Add two more SFX emitters and two Y-splitters. These will be used for the blue and red bees later. Click the configuration button to change to the preferred sound. For this tutorial we'll use the "Absorb" sound for the yellow and blue bee and the "Weird" sound for the red bee. Also, click the checkmark for Global sound.
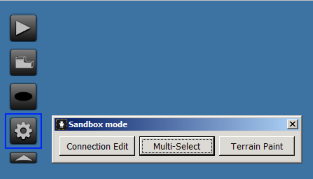
Now it's time to create a blue and red bee. To do that, first make a copy of the yellow bee by using Multi-Select under the play button.
Then select the bee and export it by clicking the button at the bottom left corner of the screen.

Name it e.g. Yellowbee1, then import a new copy of it by clicking somewhere on the screen and then this button

Deselect multi-select by pressing esc on PC or click the button with an M under the play button.
To make this a blue bee, click the configuration button on one of the yellow Plastic Boxes, type in blue then OK. Do the same for all the other yellow plastic boxes. The color should save itself so you don't have to type it in every time.
Make sure to change the frequency of the mini transmitter to 2 since this bee will give a different score. And also increase the thrust a bit on the thruster to make it fly faster.
Export it by using Multi-select again. Name it Bluebee1 and then import a new copy of it. Replace the blue boxes with red color this time, change the frequency of the mini transmitter to 3 and increase the thrust even higher for this bee. And then export the bee (Redbee1).
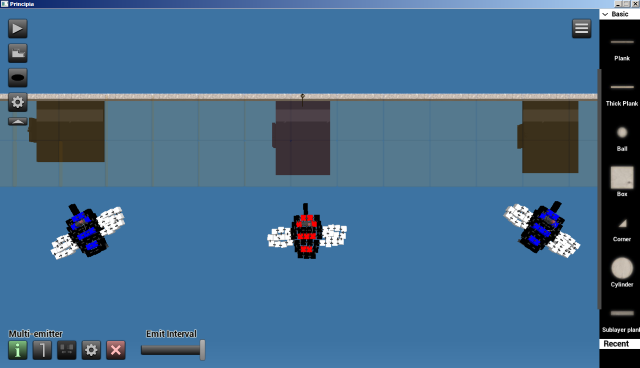
You should now have three different colored bees.
You can remove all the bees from the sandbox since we have already exported and saved them. If you need to change something you can just import them again.

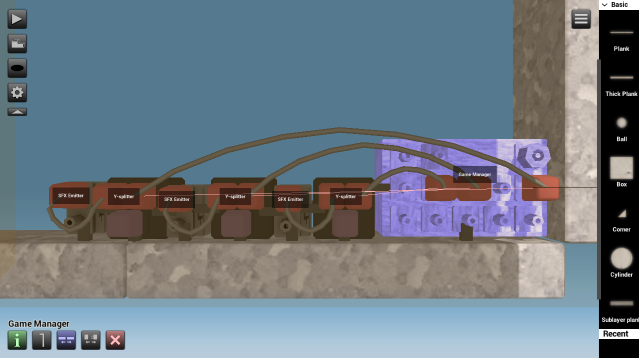
Add a Receiver with frequency 2 and 3. Attach them to the Y-splitters before connecting them to the Game Manager and SFX Emitters. Connect the blue bee (frequency 2) to IN4 of the Game Manager, and the red bee (frequency 3) to IN11.
Now make the bees spawn at the bottom of the game. Click the Multi-emitters and then the configuration button to select your bees. In this tutorial we'll have the Yellow bee on the left, blue bee in the middle and red on the right side.
Set a different Emit interval for the different bees. The red bee should spawn less frequently and the yellow one should be the most common bee on the field. You can fine tune these things later.
Make sure to rotate the multi-emitters if needed or the bees might get stuck.
Now make them spawn from the top of the game. First we need to rotate the bees and then make a new copy of them so that they fly downwards.
Import two blue and one red bee and rotate them to something like on the screenshot. You might need to decrease the thrust a bit for each bee depending on what gravity you're using. When done, export/save them with new names and configure the Multi-emitters to emit the bees.
For the sides we will use yellow bees. Import two copies of the yellow bee, rotate them so that they fly slightly upwards so that the spawn looks more random when playing, increase the thrust a bit, then export with new names and add them to the multi emitters.
To add a message at start of the game that shows game instructions we can use the Prompt object.
Add it where the Game Manager is, click the configuration button to type a message, then add a Jumper to its input socket to activate it at start.
To add a time limit to the mini game we can use a Timer. Click the configuration button and set it to e.g. 60 seconds. Connect the Timer to the IN0 socket of the Game Manager.
Add a Cam Zoomer and a Cam Targeter. We will use these two objects to set the camera to a fixed position in the middle. If you click the Cam Targeter and then the crosshair button you can select which object it should focus on.
For this game we have no object in the middle that can be targeted but we can add a Plastic box with an Auto Absorber and then use a wireless connection (Mini transmitter + Receiver) from the Prompt object and set the camera to the Plastic box. This will then be removed by the Auto Absorber after clicking OK on the startup message. Adjust the Cam Zoomer so that only the mini game layout is visible when starting the game.
Finally, you can now adjust and fine tune the Stabilizer, Thrusters and Emit Intervals of the different bees. Play around a bit and see what values you want to use. You can save different copies of the level with different values to compare which works best. Make sure to export the bees again after you've modified something.
The mini game is now finished! Feel free to make any improvements and if you're happy with it, publish it to let others try it out!
