In this tutorial you will learn how to create a simple target shooting mini game! You will find the finished example level at the bottom of this page.
Before we begin, let's look at an overview of the objects we will use in this tutorial:
First, create a new custom level, then go to level properties in the top right corner. Click the World tab, and remove all borders by changing the background to space, then set Gravity X and Y to 0 to prevent the land mines from falling back down midair after using the shooter. Click the Gameplay tab, set the Final score to 10000 and check the Disable Zoom and Disable Cam Movement checkboxes since moving the camera isn't a part of this mini game.
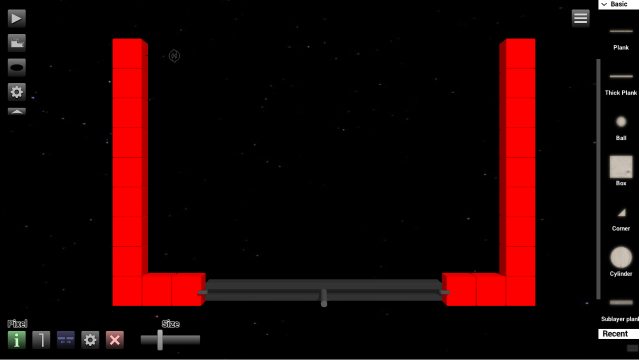
We'll begin by creating a frame for our mini game. We will use colored Pixel objects for this. Press quickadd ('space' button on PC) and type in "pixel" to add the object to the sandbox. Open up the configuration window for the pixel object to change the color. I'll use red (#FF0000) for this example.
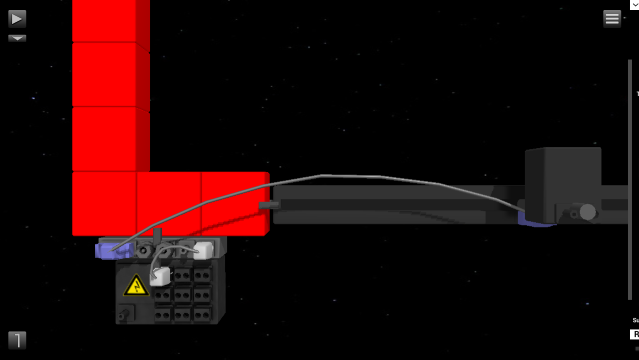
Duplicate the pixels and build the bottom frame of the mini-game like on the screenshot below. The object at the bottom is a Linear Servo which the player will be able to control and where the shooter will be placed. After you've added the Linear Servo, adjust the size slider to maximum and attach it between the pixels.
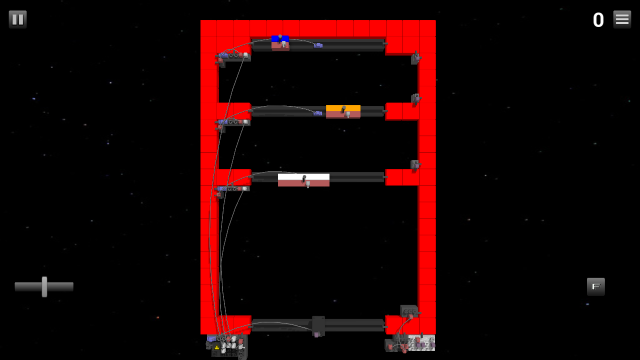
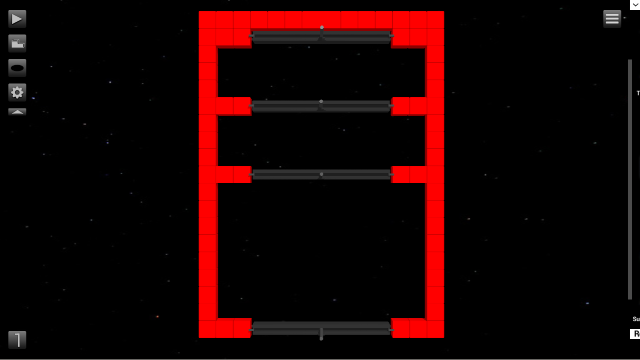
Now build the rest of the frame with pixels and add two more Linear Servos like on the screenshot below.
We'll create the shooter at the bottom using a Mini emitter. Add it to the level, then rotate it upwards and attach it to the Linear Servo. Adjust the "Emit velocity" to maximum and "Emit interval" to about 0.40. You can change these later.
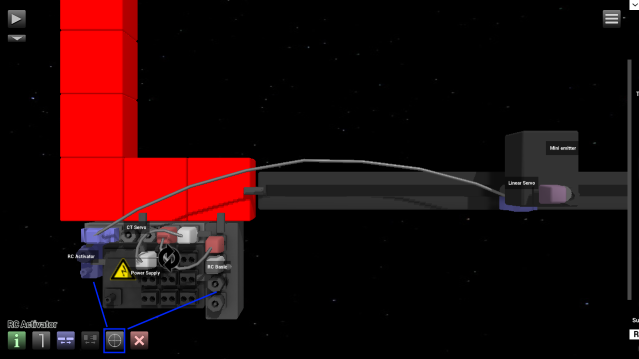
Add a Power Supply and a CT Servo to the mini game. The Power Supply gives power to the controllers that we're going to use for all the Linear Servos. Double click and drag to add a cable between the CT Servo and the Mini emitter and then a power cable from the Power Supply to the CT Servo (IN0). The CT Servo is a controller that allows you to control the precise state or angle of a motor.
Add an RC Basic beside the Power Supply. Then open up the configuration window for the RC Basic. Here we can choose what buttons we will use for the shooter. Pick the long slider for changing the position and the F button for shooting. Make sure the slider's default state is in the middle.
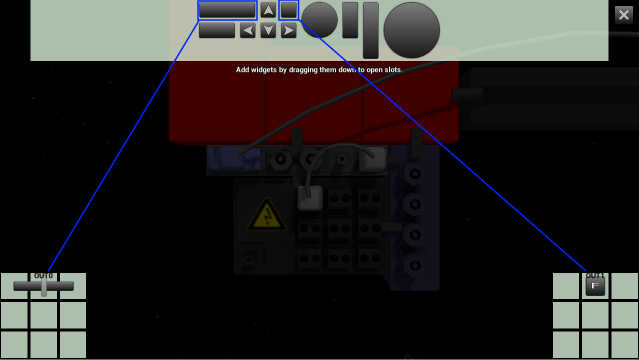
Drag a cable from the RC Basic to the CT Servo controller. For the shooter we will use a wireless connection instead of a cable. Add a Mini transmitter and a Receiver. You can click the configuration button to change the frequency used but just leave them as default for this. Attach the Mini transmitter to the RC Basic (OUT1) and attach the Receiver to the Mini emitter, first click the layer button (or 'X' button if you're on a PC) to put it in layer 2.
We have now two working buttons for the shooter but in order to shoot stuff we first need to select what to shoot. We will use a Land mine for this tutorial, so grab a Land mine, click the Mini emitter and then use the crosshair button to select the Land mine as its used object. After that you can delete the Land mine object.
You can now click the play button to test the shooter. To automatically activate the RC Basic at start we can use an RC activator. Click the target button and select the RC as shown in the screenshot.
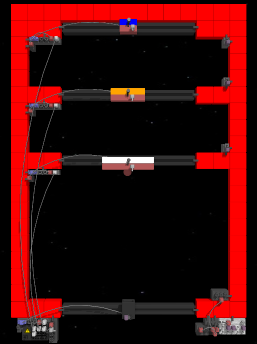
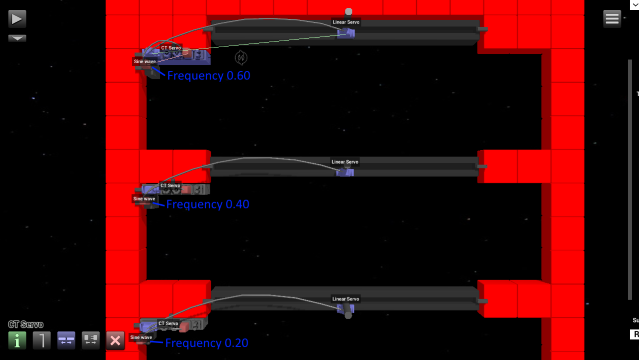
Go up and add a CT Servo to each Linear Servo and attach a Sine wave for each CT Servo, which will make it smoothly oscillate.
We will use a different frequency Hz for each Sine wave so that the mini game targets move at different speed. As you can see on the screenshot, the bottom Sine wave should have a frequency Hz of 0.20, the middle one 0.40, the top 0.60. You can fine tune these later if needed.
Attach a power cable from the Power Supply to each CT servo (to IN0).
Add 3 plastic beams. They should have different sizes, different colors and be attached to each Linear Servo. The first one should be large and easy to hit, the second one a bit smaller and the last one should be smallest and hardest to hit but will give highest score. Pick any color you like, put them in layer 2 and attach them to the motors.
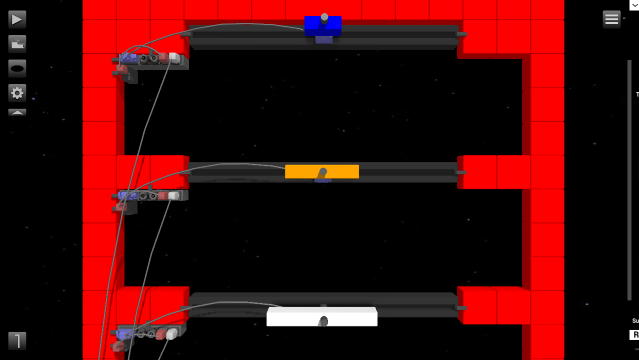
If you click the play button you can see that they now move back and forth.
In order to set a different score for each target we need a way to know when the target has been hit. We can use an Impact sensor for that, just attach one below each Plastic beam. The Impact sensor must have the same size as the plastic beam. When an object (the Land mine) collides with the Impact sensor, a value is sent through OUT0 which will be connected to a Game Manager object that adds a specific score from that target.
After you've attached an Impact sensor to the plastic beams, add 3x SFX Emitters to the level, one for each target. Open up the configuration window for the SFX Emitters and change the sound to "Ding" and check the "Global sound" checkbox. These objects will now make a Ding sound every time a target is hit and the score is increased.
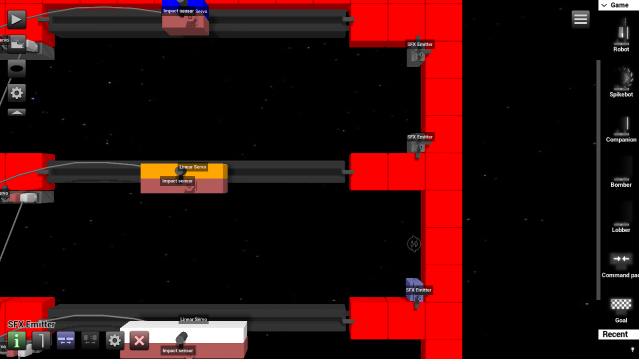
Add a Game Manager object at the bottom of the mini game and we will start connecting these objects.
We will use wireless connections for this. You can use cables if you prefer but then you'll need to add a Y-splitter for each SFX Emitter. With a wireless connection we don't need that since we'll have two Receivers for each Mini transmitter.
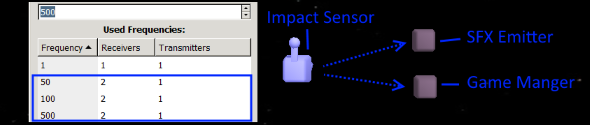
Add 3x Mini transmitters, one for each Impact sensor. Then add 6x Receivers. Click the info button on the Game Manager to see what sockets you can use. For this example we'll use IN3 (score +50) for the first target, IN4 (score +100) for the second target and IN6 (score +500) for the third target.
You can use the score number as frequency Hz for the transmitters/receivers to easier keep track of the different connections. See screenshot for example.
When you attach the Receivers to the SFX Emitter, make sure to use the IN0 socket.
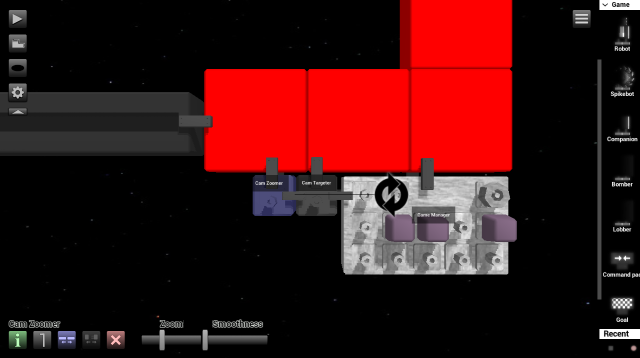
Now we're almost done. We just need to set the camera to a fixed position in the middle of the screen.
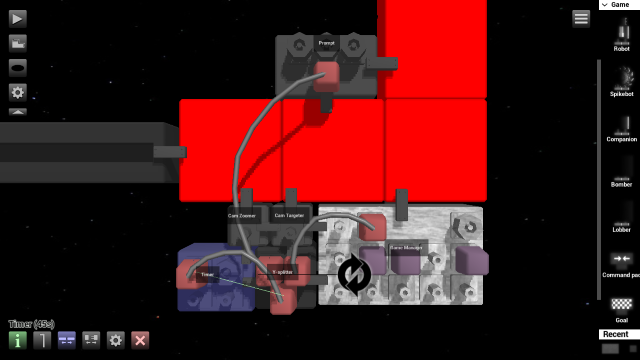
To do that, add a Cam Targeter and a Cam Zoomer. Click the crosshair button on the Cam Targeter and select an object near the middle. For me it's a Linear Servo, if yours is not in the middle you can add a black pixel in the middle of the screen select it. Then click the Cam Zoomer and increase the zoom slider a bit, click play and see what works best for your level.
When the player reaches 10000 score points the level is completed. We can add some difficulty by adding a timer that will end the game if that score isn't reached within X seconds.
Add a Timer and click its configuration button. choose a number you prefer for your level (mine is 60 seconds), leave the tick at 0 and click OK.
To have a popup message after the game has ended we can use a Prompt object. Just connect it to a Y-splitter before it's connected to IN1 in the Game Manager for ending the game. Open up the configuration window of the Prompt object and write some message.
Congrats! Your target shooting mini game is now finished!