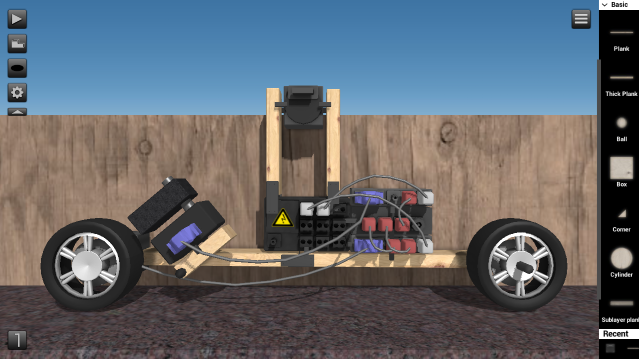
In this tutorial we will continue to build on our vehicle from the previous tutorials and this time add an angled cannon using a Servo Motor.
First, let's open up the vehicle from Building a Vehicle Part 2. If you didn't save yours, use this example level. You can also find the finished example level for this part of the tutorial at the bottom of the page.
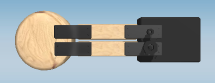
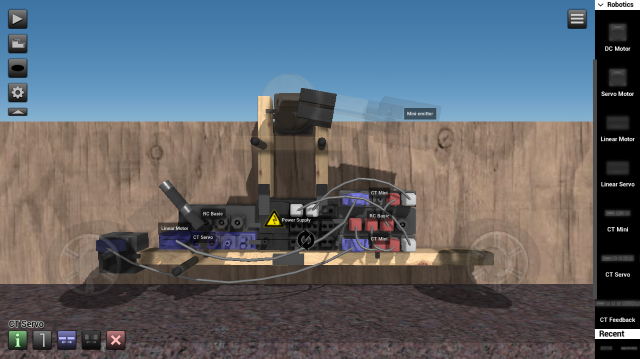
We will begin by creating a small "turret" with two planks where the cannon can be placed, then attach a Servo Motor to it. A Servo Motor has low maximum speed, high torque and is good for precise angle control or abrupt speed control.
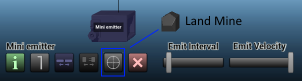
For the cannon we will use a Mini emitter that shoots stuff. Add an object that you want to use as ammo, for example Bomb or Land mine, then tell the Mini emitter to emit that object by clicking the button shown on the screenshot below. After that you can delete the object that was used. Adjust the Emit Velocity slider for a more powerful cannon and the Emit Interval slider if you want it to shoot faster.
Create a simple cannon or a "pipe" with the Mini emitter attached to it. All parts of the cannon, including the emitter, must be added to layer 2 so it can be attached to the Servo Motor.
Attach it to the motor and then add a plank under it that stops the cannon from pointing down towards the vehicle.
To control the cannon we must connect it to a CT Servo. The CT Servo is compatible with all kinds of motors but works best when connected to a servo-designed motor. It adjusts the motor's precise angle instead of speed.
We will also add another RC Basic to the vehicle for extra buttons. So let's add those two objects where there is space, for example behind the brake. You can change the Layer Visibility Mode under the Play button to easier see behind the top layers.
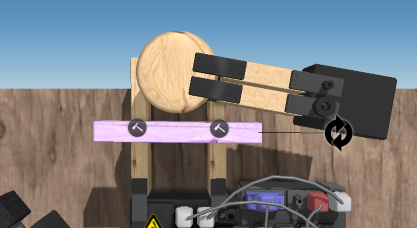
Open up the configuration window of the RC Basic and drag out the two buttons shown in the screenshot. The 'F' button will fire and the large round button will be used to adjust the cannon's position.
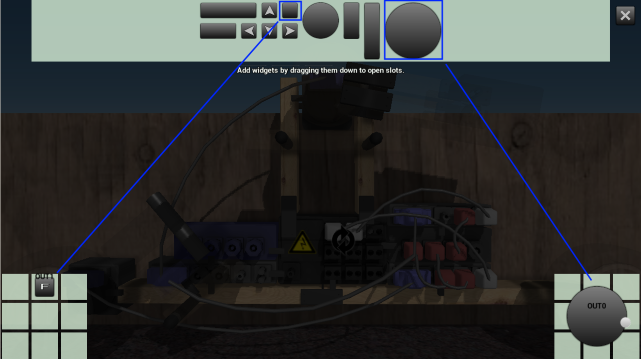
Close the configuration window, double click the RC Basic and connect it to the CT Servo from OUT0.
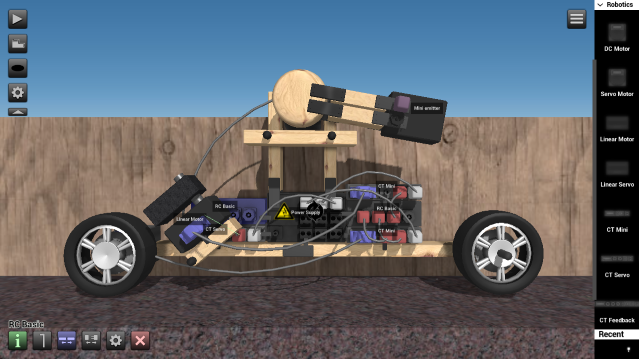
Instead of having a cable hanging from the emitter we can use a Mini transmitter and a Receiver for a wireless connection. Add those two objects. If you click the configuration button you can change the used frequency, which is useful when using many different wireless connections on the same level but we only need one frequency for this level. Attach the Mini transmitter to OUT1 of the RC Basic and the Receiver to the Mini emitter. And finally, a power cable from the Power Supply must be attached to the CT Servo.
Now we have a fully functional cannon!
If you think the cannon moves too slowly you can change it by clicking the Servo Motor and then adjust the sliders.
We'll add a button for switching between the two RC Basic controllers. To do that, we will add two RC Activators and connect one to each RC Basic with a cable, then open up the configuration window and drag out a button. For example the down ('S') button placed at the bottom left side. Click the target button for each RC Activator and connect them to the opposite RC Basic. For example, the one that has a cable attached to RC 1 should be set so it activates RC 2 when used.
You can also add a Cam Targeter to set a fixed camera position, this will prevent the camera from moving every time you switch the controllers. Just click the target button and select an object in the middle of the vehicle.
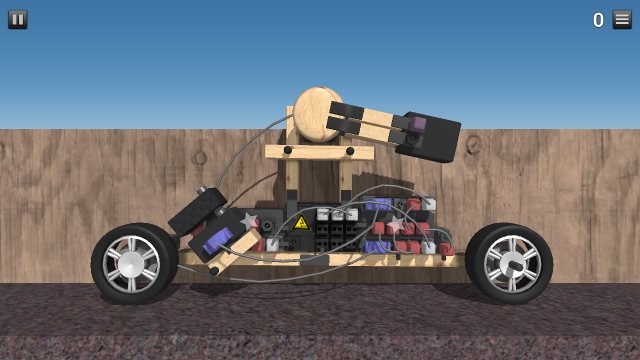
Your vehicle is now finished!
