In this tutorial you will learn how to create a simple adventure boss.
You will find an example level of a boss fight with similar mechanics at the bottom of this page.
The boss we're creating in this tutorial will have a very basic design and move towards the player robot on two wheels and attempt to kill it with bombs. Feel free to change the design however you like.
Start by creating a new adventure level.
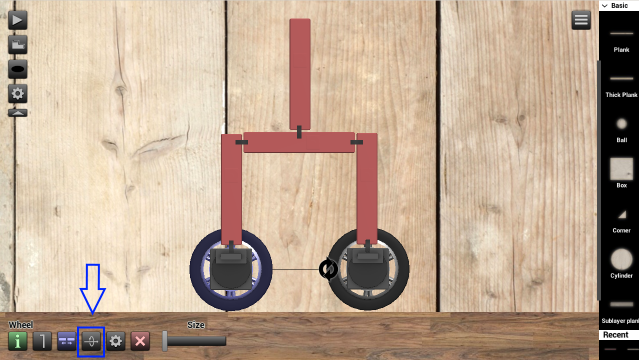
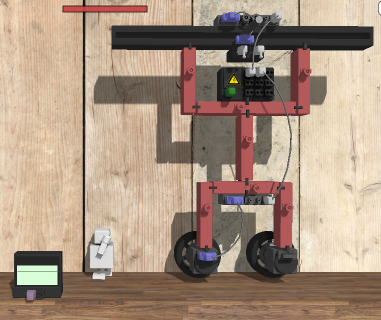
First let's create a lower body for the boss. Add two inverted Wheels with a Servo Motor attached to each, then connect them together using Impact sensors as shown on the screenshot. The Impact sensors will be used to detect when the boss is hit by the player so we can calculate the boss HP.
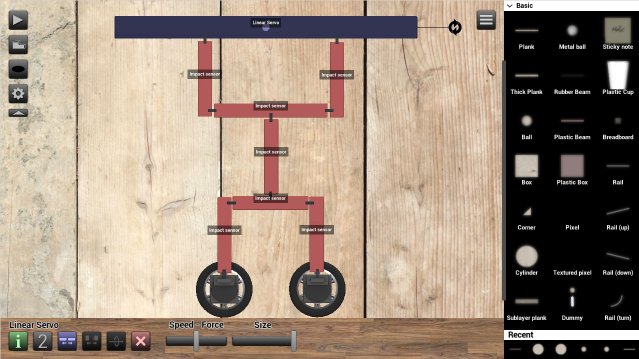
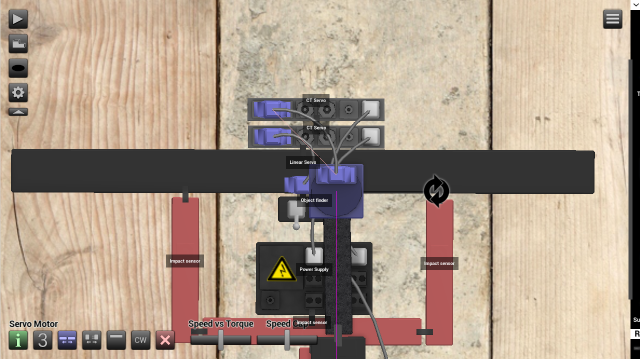
Continue on creating the upper body with Impact sensors and put a large sized Linear Servo in the middle. This is where the cannon will be placed later.
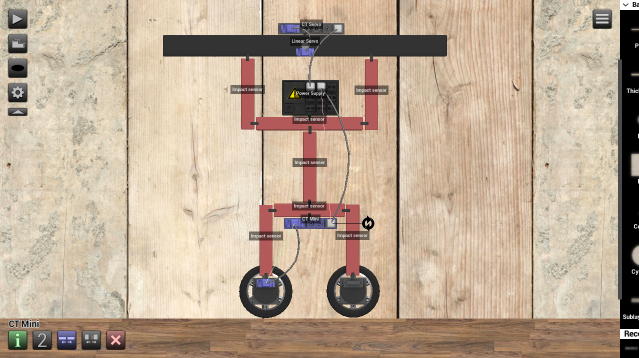
Add a Power Supply, a CT Servo for the Linear Servo and a CT Mini for one of the Servo Motors on the wheel. Then connect them with power cables by double pressing and dragging.
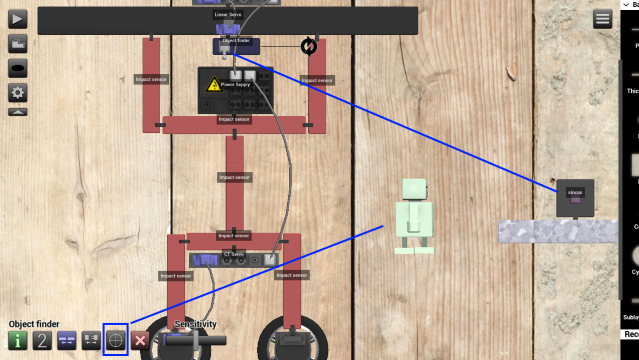
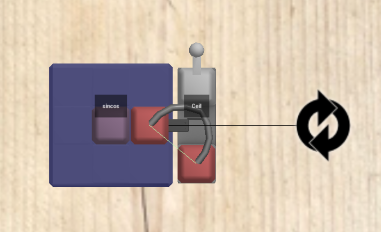
Add an Object finder in the middle under the Linear Servo. This object will be used to find the angle of the player so the boss can follow them. Click the target button and then select the player robot. Add a sincos on a platform somewhere on the side or anywhere on the level and then connect the Object finder to it with a wireless connection.
You can create a wireless connection by using a Mini transmitter and a Receiver and then set the frequency used by clicking the configuration button. Use the default frequency (1) for now. The sincos is used to convert an angle via IN0 to one positive y-value, one positive x-value, one negative y-value, and one negative x-value. This will make it easy to check if the player robot is on the left or right side of the boss.
The reason why we put some objects on the side and use a wireless connection for them is so that we don't have too many objects attached to the boss. This is especially useful in more advanced creations where we don't want to weigh down or clutter the boss with too many objects.
We will make the boss move towards and follow the player robot but keep a small distance so that there is some space for shooting. To do that, we will connect the sincos to the following objects:
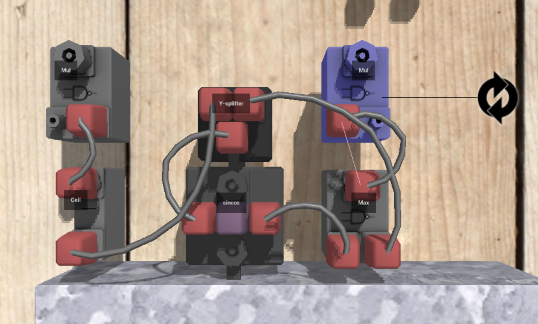
Add these objects, then connect the sincos from OUT1 (positive X angle) to the Max object, and connect OUT3 (negative X angle) to the Y-splitter, then from the Y-splitter to a Ceil and the other input on the Max, as shown on the screenshot.

This setup is enough to make the boss follow the player if you connect Max to IN1 of the CT Mini we added earlier, and the Ceil to IN2 (~reverse), but since we want the boss to keep a small distance we're going to need some more objects before adding cables to the CT Mini.
First, add a Mini transmitter and add it to the Object finder on the boss. Just make sure the frequency is set to something different than what you used for the angle input. You can set it to 2. Also lower the sensitivity of the Object finder to about 0.10.
To find a good value for the distance you can connect the Object finder to a Grapher if you want and then click play and walk the player robot towards the boss.
The Grapher displays a value from 0 to 1, so as you can see the robot distance shown on the screenshot is about 0.75 which is what we're going to use for this example.
Now go back to the objects we added earlier and connect the two Mul objects to the Ceil and Max.
Connect the two cmp-l objects to the Mul objects and use a Jumper set to value 0.75 (or whatever distance you want to use) for IN0 of each cmp-l, and add two Receivers to IN1. Set the frequency to the frequency you used for the Object finder distance output (OUT1).
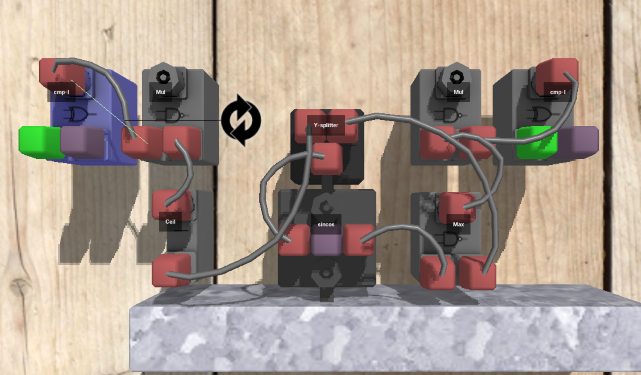
The cmp-l outputs 1 if IN0 is LESS than IN1, then the Mul will multiply that signal with speed/reverse. That means the speed is multiplied by 0 if the player is within the distance used so the boss stops.
Now you can add a wireless connection (Mini transmitters and Receivers) to the CT Mini (the one connected to the Ceil should be connected to IN2 ~reverse and the other to IN1). Make sure you're using a different frequency. You can adjust the speed of the boss by moving the sliders of the Servo Motor we used for the CT Mini.
Let's create a cannon that aims at the player. We're going to attach it to the Linear Servo we added earlier.
First, attach a Mini emitter to a plank, plastic beam or rubber beam. Make sure the Servo Motor is made flat (see screenshot) so that all three objects are on layer 3. Also make sure to align the pink rotary icon with the cannon pointing downwards.

Attach the cannon to the Linear Servo on the boss and connect it to a new CT Servo. Make sure to add a power cable to it.
To make the cannon rotate and point at the player, add a Receiver with the same frequency as the Object finder angle output (1) to the CT Servo we just added.
To make the cannon move to the left/right side depending on the player angle, add a new sincos and a Ceil. Add a Receiver from Object finder angle (frequency 1) to the sincos and connect the Ceil to OUT1. Then add a Mini transmitter/receiver to the CT Servo that is connected to the Linear Servo.
Whenever the player is on the right side the Ceil will output 1 to the CT Servo and when they're on the left side it outputs 0 and the Linear Servo is reset to the left side.
To make it smoother you can decrease the speed of the Linear Servo to minimum speed/max force (0.40) and decrease the voltage of the Power Supply.
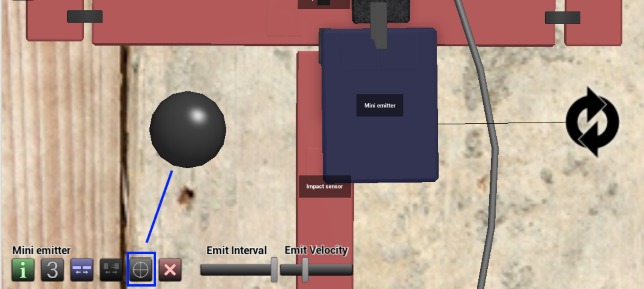
Before the boss can shoot stuff you need to select an object for the Mini emitter. Click the target button to do that. You can use for example Land mines or a Bomb for that. Make sure to increase the "Emit Velocity" and "Emit Interval" a bit. For this type of cannon I recommend that you use a Bomb and set the fuse timer to about 1 second so the player has some time to move away from it.
It's time for the boss HP.
First, add Mini transmitters with the same frequency (10 for example) for every Impact sensor. For more advanced creations you can make it so different parts of the body take different amount of damage, but for this simple example we will stick with same damage reduction for all parts.
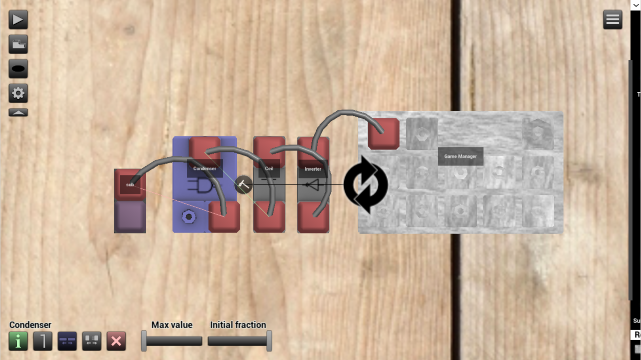
To calculate the HP we will use the Condenser object.
Add it somewhere the side, set the condenser's "Initial fraction" to 1 and "Max value" to 1. To decrease the Fraction we will use a Sub object. Add a Receiver with the same frequency as the impact sensors (10) to the sub. Then connect the sub to IN1 (decrease) of the Condenser. When an Impact Sensor is hit it will output 1 to the sub and be subtracted by a predefined value before the signal is sent to the Condenser. If you set sub's value to 0.90 that means the boss can take about 10 hits before the Condenser is empty. We'll set it to 0.95 for this example.
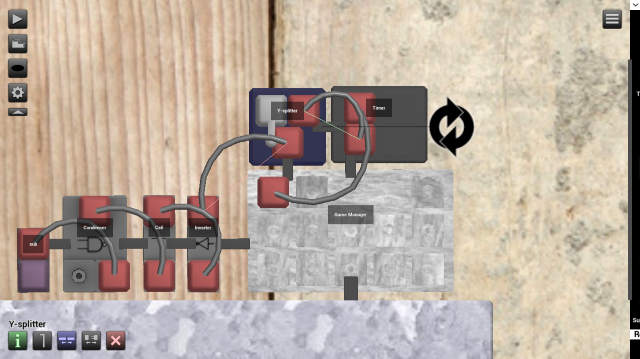
Connect the Condenser to a Ceil and then connect the ceil to an Inverter. This means the Condenser will only output 1 when its completely empty. You can then connect the Inverter to a Game Manager (IN0) to complete the game when the boss is dead.
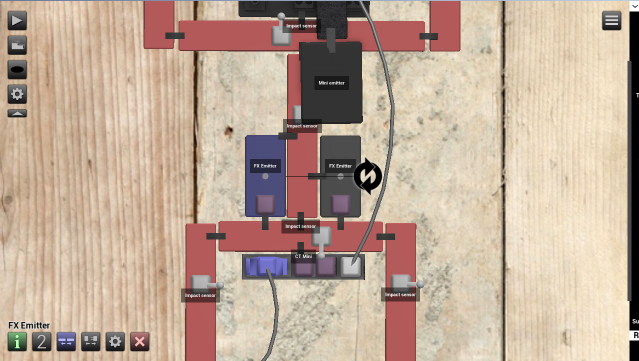
For some cool visual effects, we will add two FX Emitters to the boss. One that highlights the boss every time it takes a hit and one that makes explosions when it's destroyed. Click the configuration button to set the effects. You can also increase the radius and count a bit, especially for the explosions.
Add a Receiver with the same frequency as the Impact sensors (10) to the FX Emitter with a highlight effect.
And for the FX Emitter with an explosion effect you can add a Y-splitter with a Mini transmitter to a Receiver on the FX Emitter that is sent before the signal that is sent to the Game Manager. You should also add a Timer to add a small delay to let the explosions finish before the game is completed.
For a simple HP display, you can add a Grapher somewhere on the boss and add a Receiver from the condenser used for HP calculation. For more advanced HP displays, see Create A Transforming Adventure Boss.
You have now created a fully functioning adventure boss in Principia. Feel free to make any upgrades to it, create an adventure level around it and publish it to share it with other players on the website.
Other objects that can be useful in levels like this:
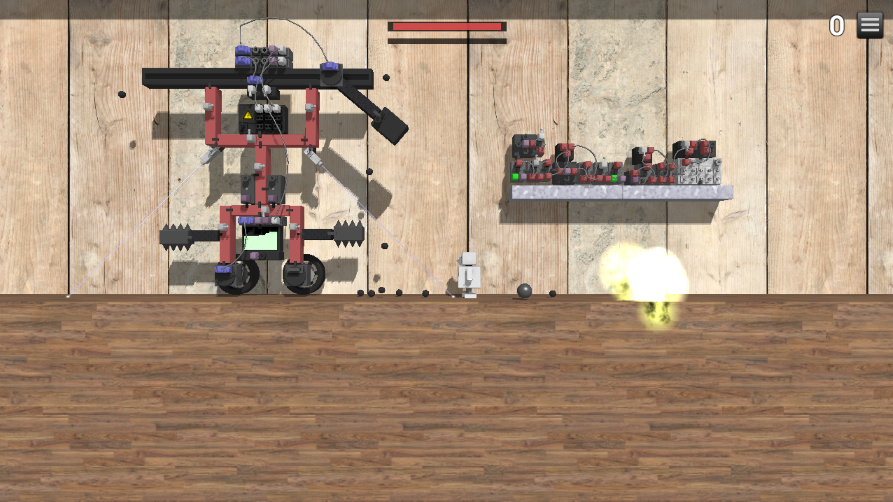
Below is an example of what you can do with a simple boss level.
